This post may contain affiliate links. Please see my disclosure policy
This No Bake Biscoff Cheesecake is rich, creamy, and packed with the irresistible flavor of Biscoff spread. With a Biscoff cookie crust and smooth cheesecake filling, it’s the perfect effortless dessert for any Biscoff lover!
If you’re a fan of Biscoff cookies, you are going to love this No Bake Biscoff Cheesecake. It’s everything you want in a dessert—rich, creamy, and packed with that warm, spiced cookie flavor—all without ever turning on the oven.
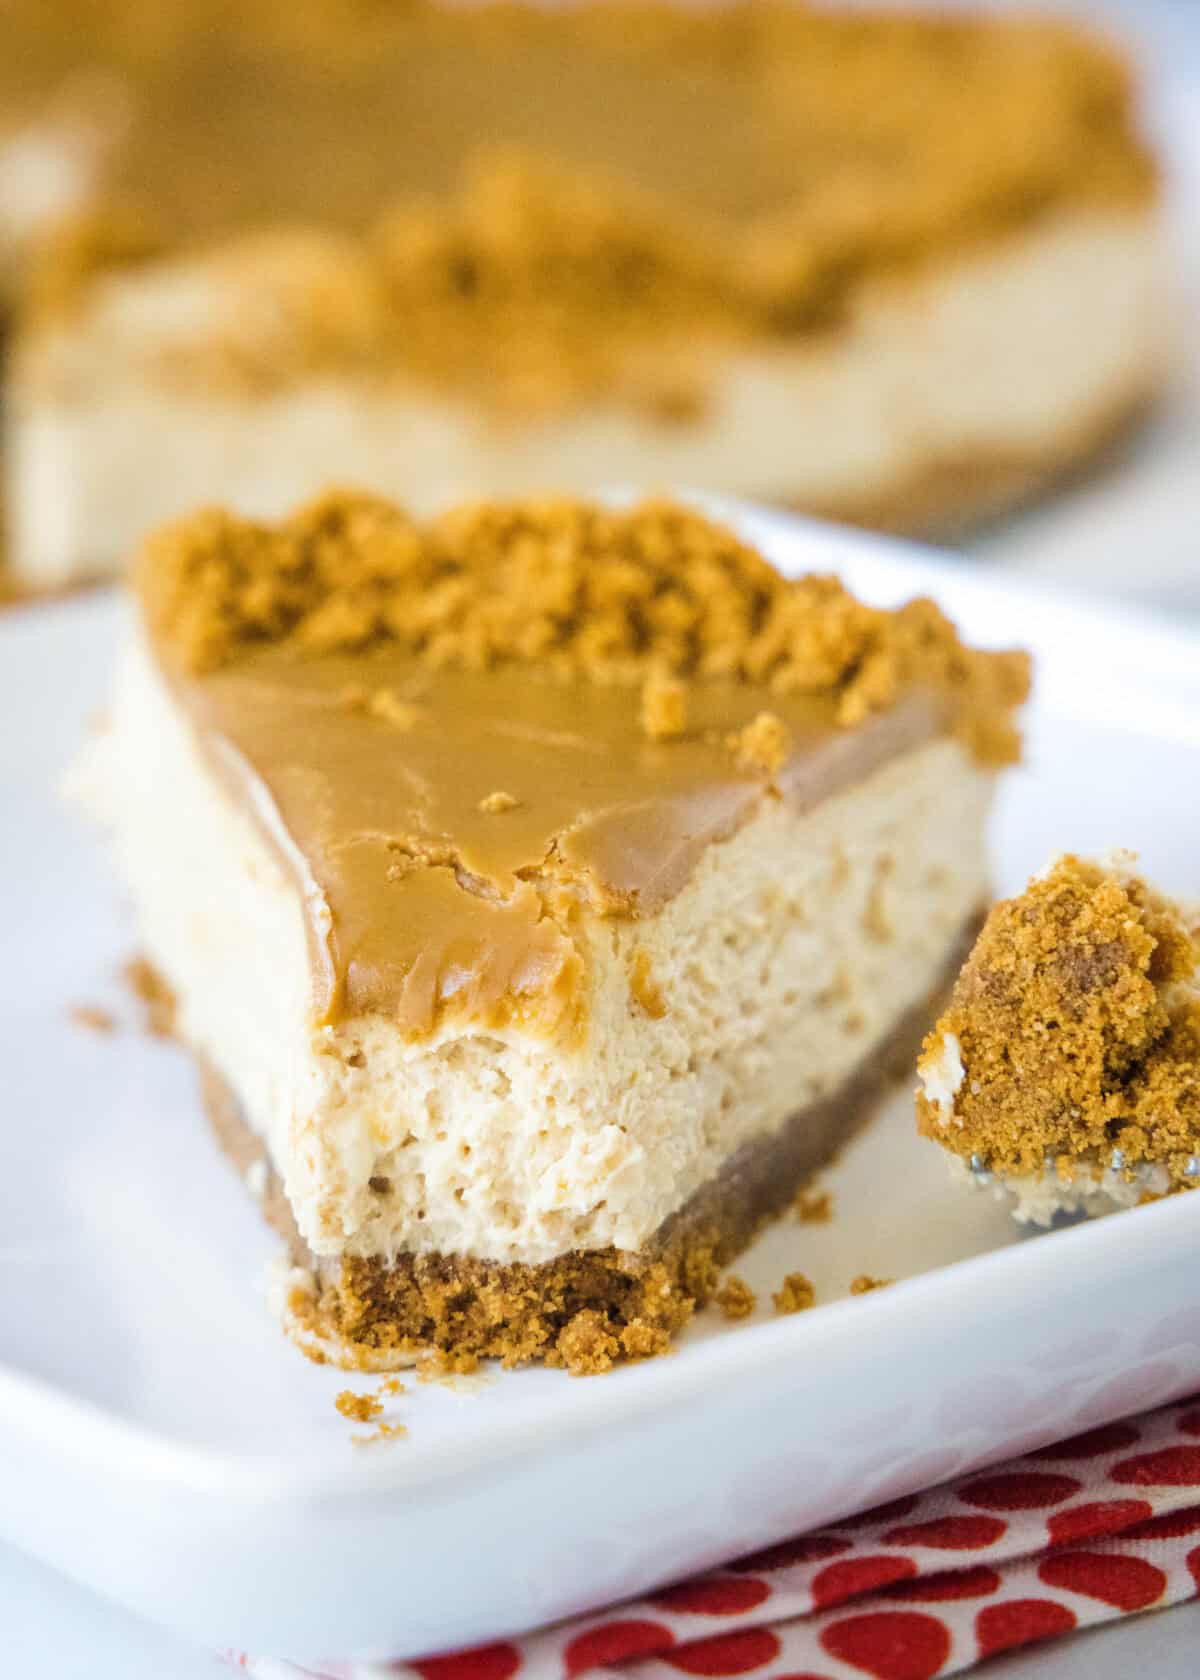
The crust is made from crushed Biscoff cookies. And the smooth, luscious cheesecake filling has Biscoff spread mixed in, as well as Biscoff spread drizzled over the top. It’s easy to make ahead and perfect for just about any day of the week.
Cheesecake is always a favorite when you bring it places, but it can be a lot of work to make. It takes at least an hour to bake, and then you have to cool it down slowly and chill so it doesn’t crack. No bake cheesecake is just so much easier to make!
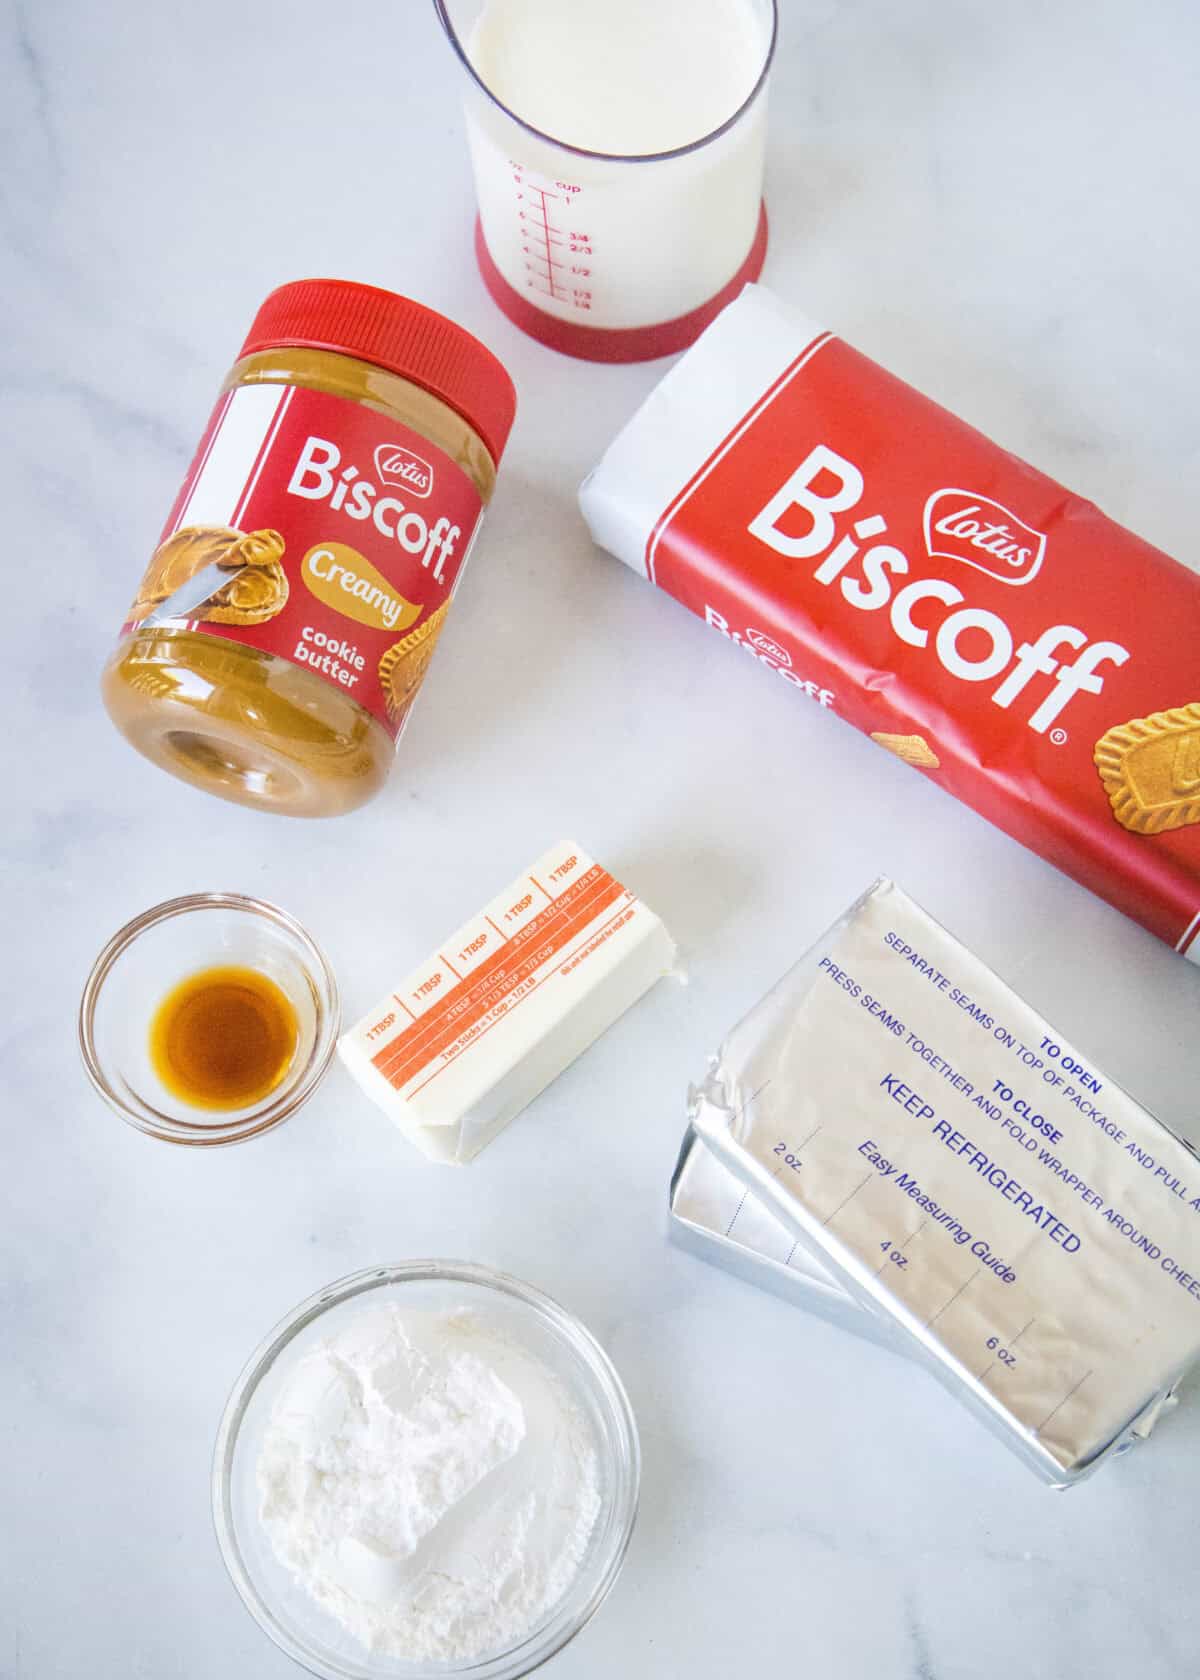
What You’ll Need
Be sure to scroll to the bottom of the post for the FULL PRINTABLE recipe card.
- Biscoff Cookies
- Butter – I always use unsalted butter in baking
- Cream Cheese
- Biscoff Spread
- Heavy Cream
- Powdered Sugar
- Vanilla Extract


How To Make No Bake Biscoff Cheesecake
- Make Crust. Add the package of Biscoff cookies to a food processor or blender and process until fine crumbs. Remove about 1/4 cup of the crumbs and set aside for later. Mix the rest with the melted butter and press into the bottom of a 9-inch spring form pan. Place in the fridge.
- Make Filling. Beat the cream cheese until it is creamy and smooth. Add in the Biscoff spread and mix until well combined and smooth. In a separate bowl whisk the heavy cream until soft peaks. Add in the vanilla and powdered sugar and beat until stiff peaks. Add the whipped cream to the cream cheese mixture and gently fold together to combine.
- Assemble. Pour the filling into your prepared crust and spread into an even layer.
- Topping. Place the remaining Biscoff spread in the microwave for about 30 seconds and stir well. Once it is pretty thin and liquid-y, pour over the top of the cheesecake and carefully spread into an even layer. Use the reserved cookie crumbs to sprinkle around the edge of the cheesecake.
- Serve. Place the cheesecake in the fridge and let it set up for about 4 hours before slicing to serve. Can set up overnight as well, just make sure to cover.

Recipe Tips & Tricks
- This is the time to break out the full fat cream cheese. It will be creamier, richer and just work better in the recipe.
- Making your own whipped cream to fold into the cream cheese mixture is what makes this light and airy. So you want to make sure you have stiff peaks and a “solid” whipped cream. But you could also swap it out for 8 oz store bought pre-made whipped cream in a pinch.
- Fully chill. You really want to make sure to really let the cheesecake set up for at least 4 hours before serving. The topping needs to solidify before slicing or it will be a mess, but you also want the filling to set up and get the right texture.
- Make ahead. This no bake Biscoff cheesecake is great to make 1-2 days before you are going to serve it. It will set up nicely and be great to make ahead.
- There are multiple brands that sell a Biscoff spread these days, Cookie Butter at Trader Joe’s is one of them. You can absolutely use that. You could even use a graham cracker crust if you don’t have Biscoff cookies.

Storage
Tightly cover any leftovers and it will last in the fridge for up to 5 days.
Freezing – Most cheesecakes, this included, are great for the freezer. You can freeze the entire cheesecake, just wrap well. Or you can freeze individual slices. I like to just put a piece of parchment paper between the slices when freezing, so you can take out individual slices later.

More No Bake Desserts

No Bake Biscoff Cheesecake
Ingredients
- 8.3 oz Biscoff cookies, divided
- 5 Tablespoons butter, melted
- 16 oz cream cheese, softened
- 14 oz Biscoff spread, divided
- 1 cup heavy cream
- 1/4 cup powdered sugar
- 1/2 teaspoon vanilla extract
Instructions
- Add biscoff cookies to a food processor or blender. Process until fine crumbs. Reserve 1/4 cup of crumbs for later.8.3 oz Biscoff cookies
- Mix together remaining crumbs and melted butter. Press into a 9-inch spring form pan. Place in the fridge until ready to use.5 Tablespoons butter
- Using and electric mixer, beat cream cheese for 1-2 minutes until it is smooth and creamy. Add 3/4 cup of Biscoff Spread, and mix until well incorporated. Pour into a mixing bowl and set aside.16 oz cream cheese, 14 oz Biscoff spread
- Using an electric mixer, beat heavy cream until soft peaks. Add powdered sugar and vanilla extract and beat until stiff peaks. Scrape down the sides as necessary.1 cup heavy cream, 1/4 cup powdered sugar, 1/2 teaspoon vanilla extract
- Add the whipped cream to the cream cheese mixture and gently fold together until evenly combined. Pour into prepared crust.
- Heat the remaining Biscoff spread for about 30 seconds in the microwave. Stir well until it is thin and pourable. Pour over the cheesecake and gently spread into an even layer.
- Sprinkle the reserved cookie crumbs around the edge of the cheesecake.
- Cover and chill for at least 4 hours before slicing to serve.
Nutrition
Nutrition information is automatically calculated, so should only be used as an approximation.
I created a fun group on Facebook,and I would love for you to join us! It’s a place where you can share YOUR favorite recipes, ask questions, and see what’s new at Dinners, Dishes and Desserts (so that you never miss a new recipe)!
Be sure to follow me on Instagram and tag #dinnersdishes so I can see all the wonderful DINNERS, DISHES, AND DESSERTS recipes YOU make!
Be sure to follow me on my social media, so you never miss a post!
Facebook | Twitter | Pinterest | Instagram
.